
 I’ve been on a bit of a madeleine kick lately (remember those lemon ones from last week?). For whatever reason, I got it in my head that I wanted to make a chocolate version and I’ve been working on this over the past couple of weeks. My
 taste testers colleagues and neighbours can attest that the testing process has been rigorous and a bit challenging (not the eating part!).
 Madeleines are the perfect treat to share with friends and colleagues – even those from who you are separated. A dozen Ziploc snack bags means you can distribute them safely, with virtually no contact. My colleagues got to taste two of these versions and my neighbours got two or three other versions. Finally, today, I have a version I am happy with.
 Why so many test batches?
Well, I mean, having test batches of small cakes around the house does make life sweeter but that’s not the reason I test recipes multiple times! With a madeleine, I’m looking for:
- Great taste
- Great texture
- Good looking final product (the sometimes elusive “hump” on top of each cake)
- Ease of use (of the recipe)
- Less fuss factor (lots of madeleine recipes call for long rests in the fridge – overnight like in the case of my lemon version – but I found this rendered the batter WAY too thick to work with – it was almost solid (think, the inside of a truffle) after spending so long in the fridge). I don’t want something that looks too fussy to make.

How did all those test batches work out? What was I looking for?
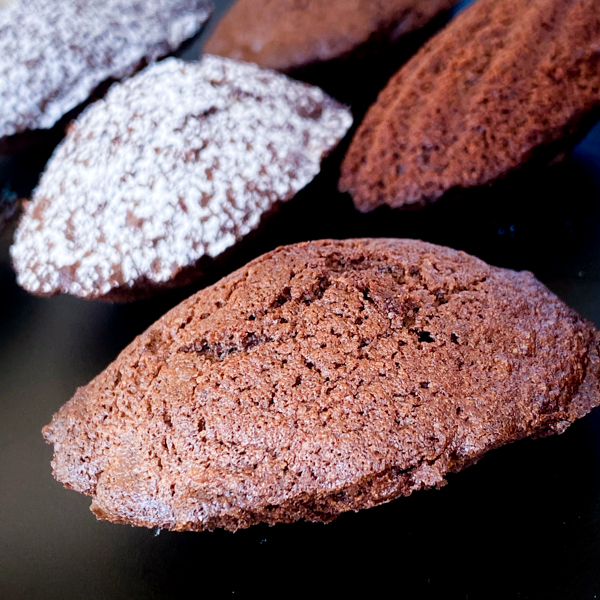
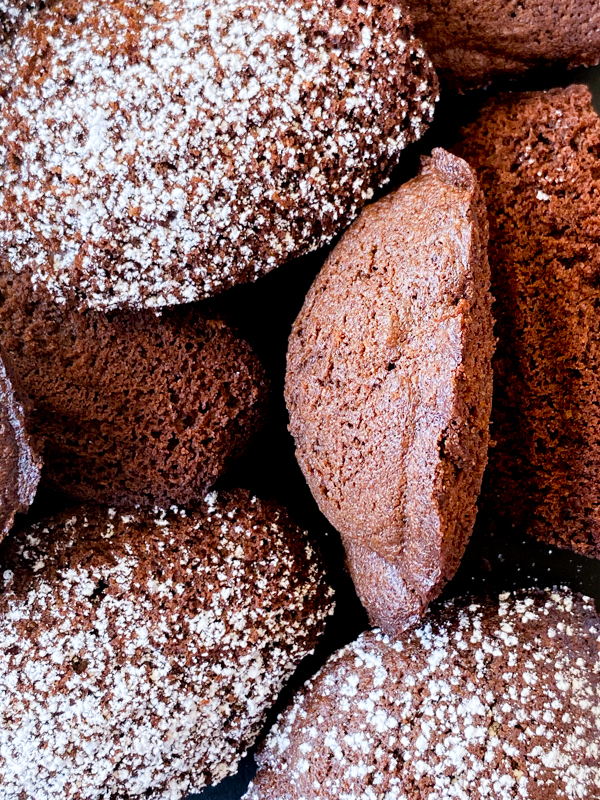
Some of those “wanted” elements were easy to figure out – all versions tasted great and had a nice texture (crispy on the outside and fluffy on the inside). NOT all versions had the “hump” though and, in fact, running a quick image search, I didn’t find a lot of chocolate madeleines that did. Many of the versions I found showed photos of the scalloped side (which is easy to create since, you know, the pan will do it for you!) but I couldn’t find any that looked EXACTLY like the vanilla ones, just chocolate.
Some of my test batches were completely flat. Others rose beautifully but cracked on the top and weren’t lovely to look at. Playing with the time I rested the batter seemed to make a difference. When I’m developing a recipe, I want it to be a “doable” recipe, one that people will look at and think “I can do that”, not one that people will look over because it looks like it’s too complicated (technique, hard-to-find equipment or fussy timing etc.). This version seems to do the trick! There is a little bit of wait time but not too much. The batter is easy to work with, it doesn’t solidify too much that it’s frustrating to work with (this was the case when the batter rested too long in the fridge).
So, after 5 (6?) batches, voilà: A recipe I’m happy to share, finally!
Madeleines au chocolat/ Chocolate madeleines
Love madeleines? Love chocolate? This recipe combines both - a light, fluffy cake with crispy edges and a melt-in-your-mouth texture.
Ingredients
- 1 tablespoon (14 g) unsalted butter, melted, for greasing the pans
for the madeleine batter
- 1/4 cup (57 g/ 1/2 stick) unsalted butter
- 1/3 cup (66 g) granulated sugar
- 1 large egg
- 1/2 teaspoon pure vanilla extract
- 1/4 cup (38g) all-purpose (plain) flour
- 2 tablespoons (14g) cocoa powder
- 1 teaspoon baking powder
to serve
- approx 2 tablespoons icing sugar, for dusting.
Instructions
At least 1 hour before baking - prepare the madeleine pan
- Brush the madeleine pan with the melted butter, making sure to get the butter into all the grooves, but don’t let it pool there (if necessary turn the pan upside down over a paper towel to drain out).
- Place the pan in the freezer.
Prepare the batter
- Melt the butter either in a small pot on the stovetop over medium heat, or in a microwave-safe bowl in the microwave for about 1 minute. Set aside to cool.
- Beat the sugar with the egg and vanilla with handheld electric beaters on high speed for 3 -4 minutes, until thick, creamy and slightly pale.
- In a separate bowl, whisk the flour, baking powder and cocoa powder together.
- Add the dry ingredients to the wet and use a rubber spatula to gently fold them in until the dry ingredients are just combined.
- Add the cooled, melted butter to the batter and use a rubber spatula to gently mix until the butter is completely incorporated. The batter will be a little runny.
- Cover the bowl with plastic wrap and place in the fridge for 45 minutes.
When you’re ready to bake (after approx 45 minutes))
- Remove the madeleine pan from the freezer and fill each cavity about three-quarters full. It’s easiest to use a small spoon or 1 tablespoon cookie scoop to fill the cavities. You're going to use a heaping tablespoon full of batter for each cavity. Do not spread the batter out, it will settle when it bakes. Once you have filled all the cavities, place the tray in the fridge while the oven pre-heats.
- Preheat the oven to 425˚F (220˚C). When the oven is at temperature, remove the madeleine pan from the fridge and then bake for 23-15 minutes. Your madeleines should be darker around the edges (and look like they are pulling away from the pan) and may have a bump on top—it can be quite pronounced. Don’t worry, that bump is meant to be there! A toothpick inserted into the centre of the cake should come out clean, or with a few dry crumbs.
- Remove the pans from the oven. Immediately remove the madeleines from the pans (use a small knife, spoon or toothpick to coax them out if they don’t just pop right out) to cool on wire racks.
- Madeleines are best the day you make them, but they can be stored in an airtight container at room temperature for a few days.
- Sprinkle with icing sugar when cool and serve immediately.
Recommended Products
As an Amazon Associate and member of other affiliate programs, I earn from qualifying purchases.


What about you – is there a recipe you’ve worked hard to perfect?
_________________
Like this post? Get blog posts delivered to your inbox! Sign up here!
__________
MY BOOK! In the French kitchen with kids is out now! Click here for details and how to order!
